Embarking on a property rehab project can be a daunting task, especially if you’re new to the world of real estate investment. The process involves numerous steps, each with its own set of challenges and intricacies.
I recently learned how important this was a few months ago with my last rehab, For example, I installed all new doors BEFORE installing the new floor. But then learned that the new floor would raise the height of the floor more and now the newly hung doors wouldn’t close or they would scrape the floor. So I should have installed the doors AFTER installing the floor. I also failed to do some plumbing work before painting, which led me to go backward and break open the freshly painted wall to repair the plumbing. It’s little noobie mistakes like these that cost time and money but can easily be avoided.
Through personal experience and a bit of trial and error, I’ve distilled the process into a manageable sequence of stages that have proven effective in my rehab ventures if followed in order. This guide aims to lay out these stages in a clear, concise manner, helping you navigate your rehab project with greater ease and efficiency. Below is the rehab order of operations that I recommend going about your rehab.
1. Secure the Property from Outside Elements

The first step in any rehab project, particularly for distressed properties, is to ensure the property is sealed and secure. This means boarding up any broken windows and repairing roof leaks to prevent water damage and deter unwelcome visitors, whether they be animals or people. Although this step might not apply to every property, it’s a critical foundation for beginning your rehab work in earnest.
2. Turn On Utilities

Before any significant work begins, it’s essential to have working utilities. This includes electricity, water, and gas, if applicable. Having these services activated early on facilitates the rest of the rehab process, from powering tools and lights to enabling any necessary plumbing and electrical work.
3. Demo and Clean Out
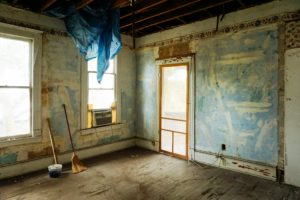
Once the property is secure and utilities are on, the next step is to remove any unwanted materials, fixtures, or structural elements. This demolition phase clears the way for new installations and renovations, allowing you to start with a clean slate. Cleaning out debris and removing outdated components is also part of this stage, setting the stage for the main renovation work.
4. Plumbing and Electrical

Addressing the property’s plumbing and electrical systems is crucial before moving on to more cosmetic updates. This includes installing new plumbing lines, fixing any existing issues, and updating the electrical wiring to meet current standards. Tackling these elements early on prevents the need to backtrack and make costly adjustments after other renovations have been completed.
5. Flooring
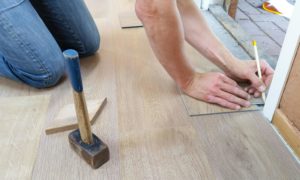
Installing new flooring comes next. Whether you’re laying down hardwood, tile, or carpet, it’s important to do this before proceeding with other interior updates. As learned from personal experience, installing flooring before certain other steps, like hanging doors, ensures everything fits and operates correctly.
6. Fix Drywall and Paint
With the flooring in place, the next steps involve repairing any damaged drywall and applying a fresh coat of paint. These updates begin to bring the interior space together, providing a clean, refreshed look that sets the stage for further aesthetic enhancements.
7. Cabinets, Countertops, Vanities, and Baseboards

Installing cabinets, countertops, vanities, and laying baseboards comes next. These elements are essential for defining the interior space, offering both functionality and aesthetic appeal. It’s important to have the flooring installed prior to this step to ensure a seamless integration of these components.
8. Adding Fixtures

Once the major installations are complete, it’s time to focus on the details by adding fixtures. This includes ceiling fans, lights, and backsplashes, among others. These final touches can significantly impact the overall look and feel of the property.
9. Paint Touch-Ups

![]()
As the rehab nears completion, it’s common to discover scuffs, nicks, and other minor damages that occurred during the renovation process. This stage is an opportunity to make any necessary paint touch-ups, ensuring the property looks its best.
10. Exterior Work

Finally, attention turns to the exterior of the property. This can include updating the roof, soffit, fascia, windows, and landscaping. The order in which these tasks are completed can vary, as they depend on other factors such as window installation requirements or specific exterior needs.
Conclusion
Following this structured approach to rehabbing a property can save both time and money, preventing the need to redo work and ensuring a smoother renovation process. Remember, each property may have its unique challenges, but adhering to this general order of operations can guide you through most rehab projects effectively. Whether you’re a seasoned investor or a newcomer to property rehab, understanding and applying these stages will enhance your ability to transform any space into a valuable asset.